
Inspection Schedules | Preparing Your Trailer | Axles, Wheels, Brakes | Trailer Structure | Trailer Components
Trailer Maintenance
Regular trailer maintenance is critical to ensuring the longevity of your trailer, as well as making sure you are able to tow to your destination safely. Before towing, make sure your trailer and its many components are in safe working order. Worn or broken trailer parts can cause loss of control and injury may result. After any accident or impact, it is important to have your trailer professionally inspected.
You must inspect, maintain and service your trailer regularly to insure safe and reliable operation. If you cannot or are unsure how to perform the items listed here, have your dealer do them.
Note: In addition to this information, also check your trailer’s owner’s manual and the relevant component manufacturer’s manuals. Where discrepancies may exist, defer to the manufacturer's manual.
What follows is a recommendation for minimum maintenance. However, depending on the trailer usage, including cargo weight and mileage, as well as the environmental factors where the trailer is in use, your trailer may need more regular maintenance than that which is described below.
Inspection Schedules
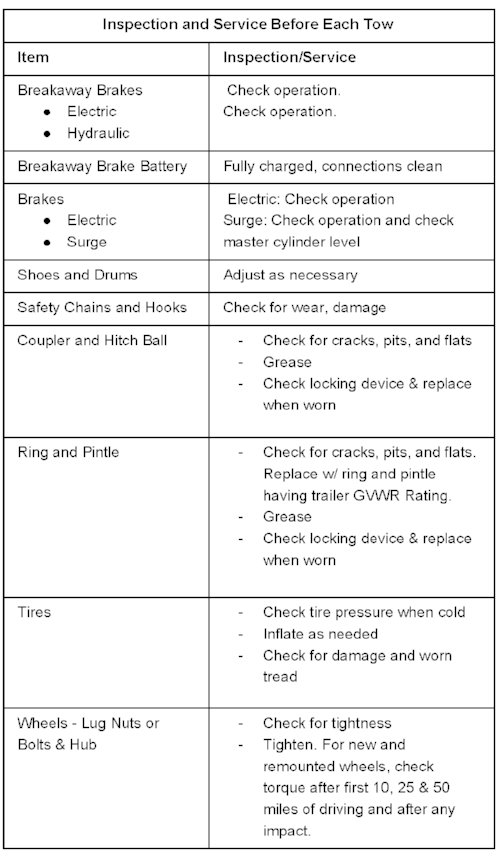
Inspection and service before each tow
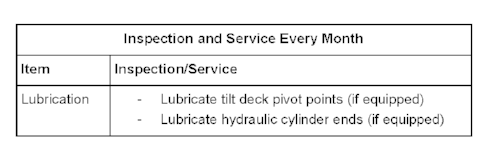
Inspection and Service Every Month
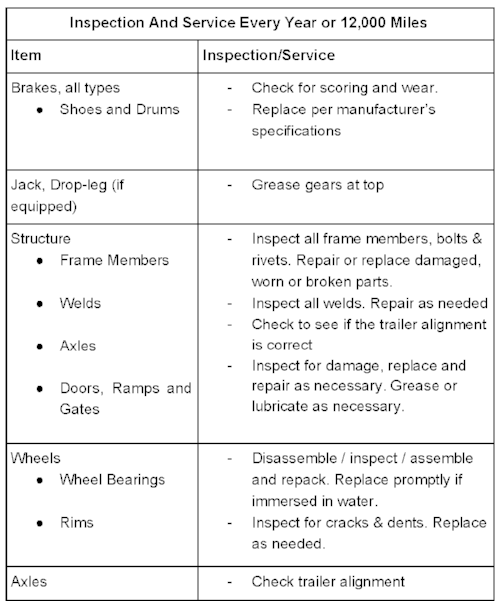
Inspection and Service Every Year
Preparing Your Trailer for Maintenance and Inspection
Jacking a Trailer
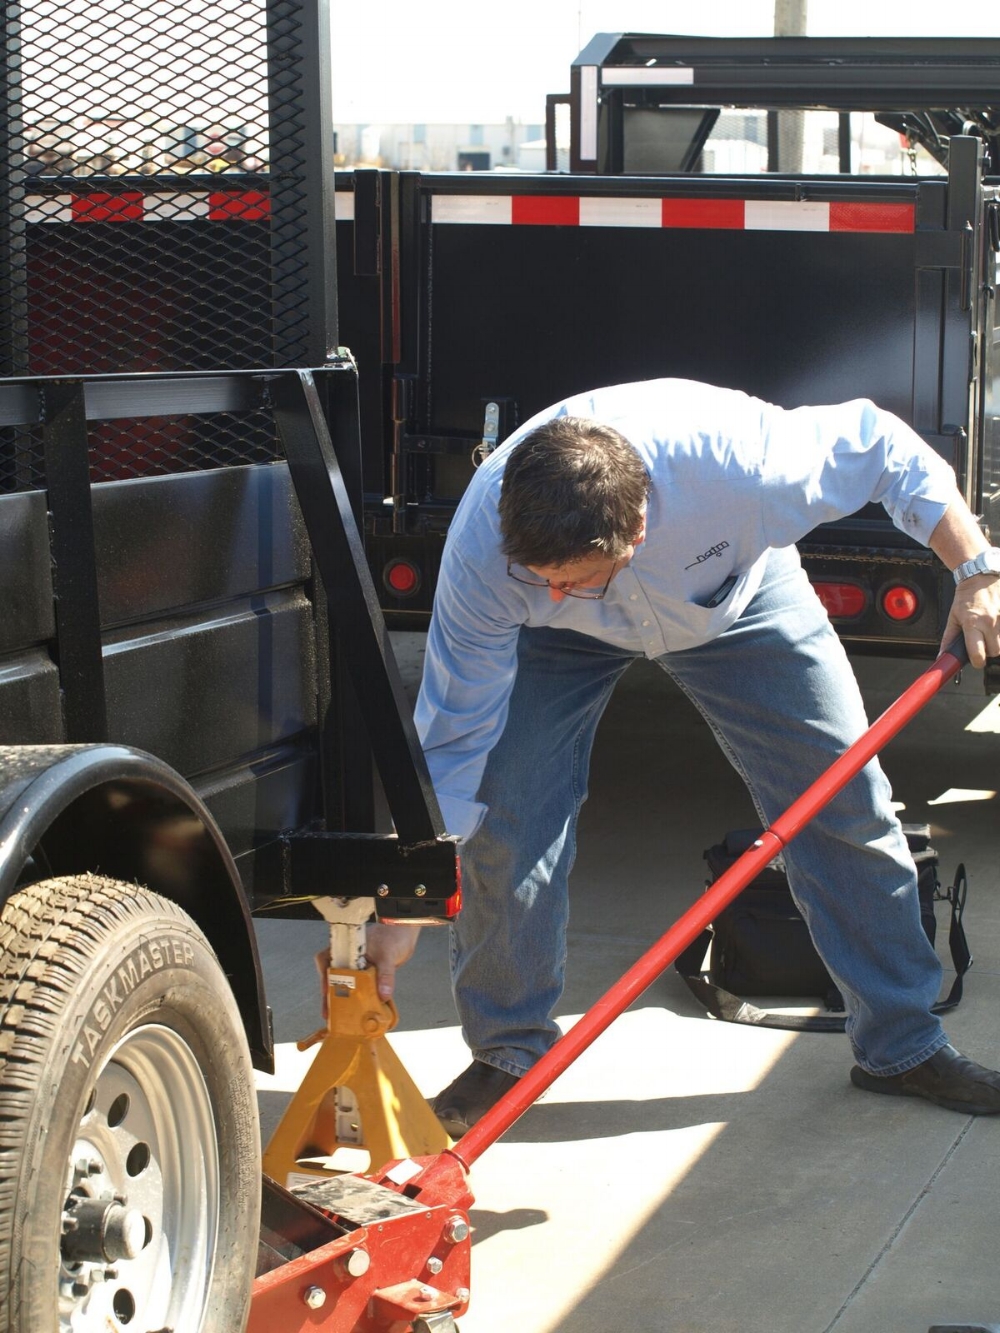
To perform many inspection and maintenance activities, you must jack up the trailer.
Park the trailer in a safe environment on level ground.
Check the trailers owner’s manual for suggested jacking points. If this information is unavailable, place jacks and jack stands under the outer frame rail to which the axles are attached. Some trailers are equipped with attached jack stands at the appropriate location.
Make sure the jacks are clear of the wiring, brake lines and suspension parts including springs, and torsion bars.
Do not use the trailer’s axle for support.
Do not touch the wiring or hydraulic tubing.
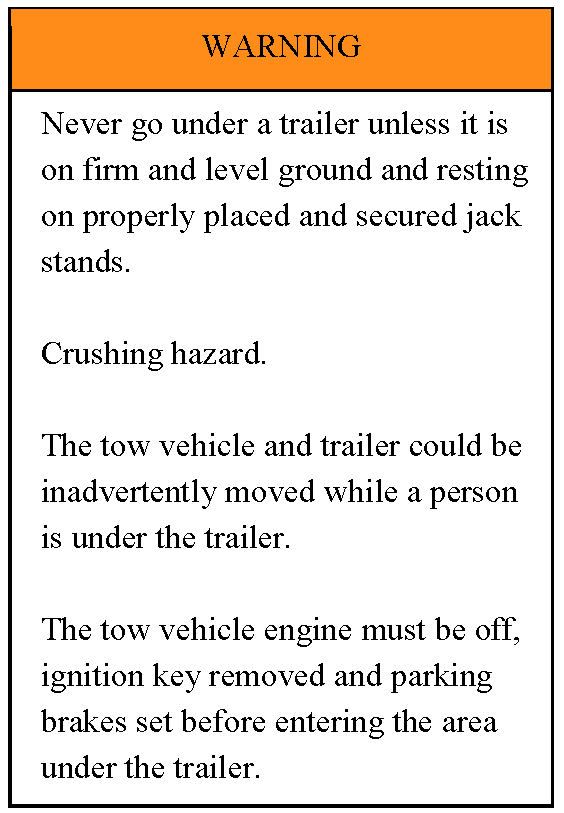
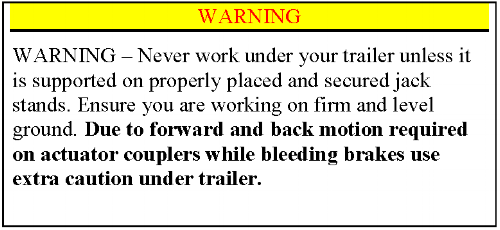
NEVER crawl under your trailer unless it is supported on properly placed and secured jack stands on firm and level ground.
If working on one side of trailer, ensure the wheel on opposite side is blocked before jacking trailer.
If you are removing the tire, you should loosen the wheel nuts before the tire is off the ground.
Lancaster, C., & Klein, R. (2009). The Trailer Handbook: A Guide to Understanding Towing & Trailer Safety. Topeka, KS: National Association of Trailer Manufacturers.
jack stand maintenance
Jacks are primarily used to lift and stabilize the trailer tongue, or front corners; for lifting the trailer to connect and disconnect from the tow vehicle. They are also used to keep the trailer level while not attached to the tow vehicle as well as stabilizing the rear of the trailer when loading and unloading. They may contain gears if the handle is on the side or an acme screw system if the handle in on the top.
Top wind - Check for proper function, top wind jacks normally require little internal maintenance. If they do not wind to raise and lower the leg, usually the complete jack needs replacing. Ensure the jack is stable and tightly fastened to the trailer. For swivel jacks, check mounting/swivel hardware for worn or broken parts.
Side wind – Check gears at top where handle cranks jack leg. Grease if needed, use grease fittings if present otherwise pump or hand pack grease into gears. Check at least annually. Ensure the jack is stable and tightly fastened to the trailer. For swivel jacks, check mounting/swivel hardware for worn or broken parts.

Axles, Wheels, Brakes
tires, wheels & lug nuts
Before each tow, check the tire pressure to make sure it is at the level indicated on the tire sidewall or VIN label. Tire pressure must be checked while the tire is cold. Do not check tire pressure immediately after towing the trailer. Allow at least three hours for the tires to cool if the trailer has been towed for as much as one mile. Tires can lose air over a period of time.
Inspect tire sidewalls for bulges, bubbles, cuts or foreign objects. Repair or replace if needed to avoid a possible blow out while towing.
Inspect tire tread for worn or bald spots. Tread depth should be greater than 1/16th inch at any lowest point. Replace the tire before towing the trailer if the tire treads have less than 1/16th inch depth or the telltale bands are visible.
If you are storing your trailer for an extended period, make sure the tires are inflated to the maximum rated pressure indicated on the sidewall or VIN label and that you store them in a cool, dry place such as a garage. Use tire covers to protect the tires from the harsh effects of the sun.
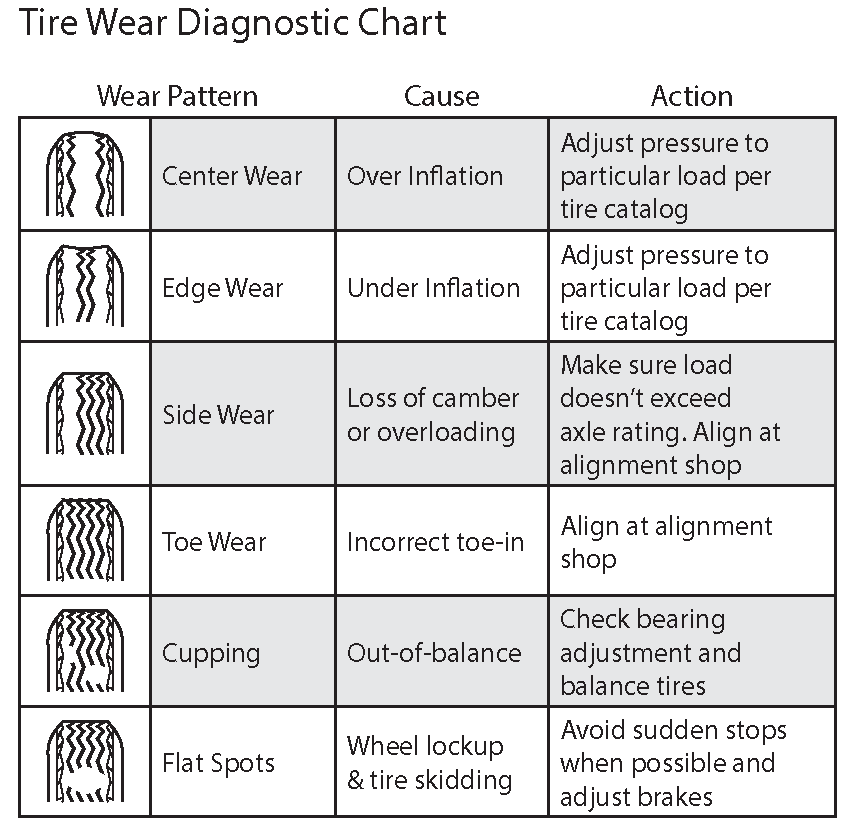
See the following chart for various tire problems along with their causes and possible remedies.
Inspect each wheel for damage, out of round or bent. Damage can occur when the wheel and tire hit or bumps curbs. If the trailer has been struck, or impacted, on or near the wheels, or if the trailer has struck a curb, inspect the rims for damage. Replace any damaged wheel. Inspect the wheels for damage every year, even if no obvious impact has occurred.
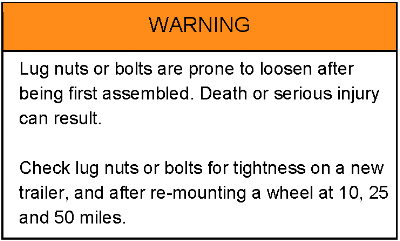
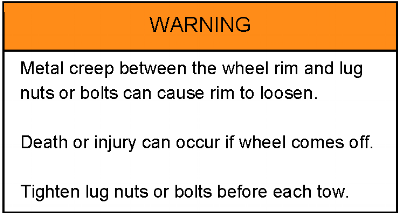
Lug nuts or bolts are prone to loosen right after a wheel is mounted to a hub. When driving on a remounted wheel, check to see if the lug nuts or bolts are tight after the first 10, 25 and 50 miles of driving, and before each tow thereafter.
Tighten the lug nuts or bolts in three stages to the final torque in order to prevent wheels from coming loose. Tighten each lug nut or bolt in the order shown in the following figure. Use a criss-cross or star pattern to evenly tighten the wheel nuts or bolts; see the following for recommended torque sequence.
Use a calibrated torque wrench to tighten the fasteners. Verify that wheel studs are free of contaminates such as paint or grease, which may result in inaccurate torque readings. Over-tightening will result in breaking the studs or permanently deforming the mounting stud holes in the wheels and will void the axle warranty.
See your axle manufacturer’s manual or your dealer for wheel nut or bolt torque specifications.
Wheel Hubs and Bearings
Wheel Hubs:Trailer wheel hubs connect the trailer tires to the trailer axle and allows them to spin. During inspection, check to see if they are damaged, corroded or improperly installed in order to avoid issues such as impaired steering or a broken axle. Check the hubs every 2,000 miles
Wheel Bearings: Trailer wheel bearings need regular maintenance, and with enough towing, replacement. The bearings are located within the wheel hub and reduce the friction between the wheel and wheel assembly. Because the bearings are hidden from plain view, it is crucial to remember to take the necessary time to open the wheel hub and inspect. A loose, worn or damaged wheel bearing is the most common cause of brakes that grab.
To check your bearings, jack up the trailer and secure it on adequate capacity jack stands.
Check wheels for side-to-side looseness by gripping the tire firmly with both hands and shaking. If it feels loose or rattles, remove dust caps and check for low grease or a loose axle nut.
Repack bearings every year or 12,000 miles
Tools needed to check or replace the bearings:
Pliers
Lug wrench
Hammer
Flathead screwdriver
Jack and wheel blocks to safely raise the wheel off the ground
To learn how to replace trailer bearings, click here.
Removing Hubs to Access Bearings For Cleaning:
Remove lug nuts and tire.
Remove dust cap or bearing protector if present.
Remove cotter pin.
Remove castle nut and washer.
Loosen small outer bearing by pulling out on hub.
Remove bearing cone.
Remove hub assembly from spindle. It should ideally slide off, but if it is stuck and increased force will not slide it off, bring it to a garage to remove.
Remove the outer bearing.
Remove the spindle washer
Remove the inner seal and remove the inner bearing.
Remove the grease seal from the back of the hub. It should be well seated and difficult to remove. Use a large screwdriver to remove. It is nearly impossible to remove the grease seal without destroying it if it is set properly. For brake drum hubs, place the drum with the seal down and use two hammers to force the seal and bearing out. The grease seal should always be replaced when removing the hub, so ensure you have new seals available when checking the bearings.
Remove the large bearing below the grease seal.
Take the inner and outer bearing cages out of their races and clean them with rags.
Wash the bearing cages in a solvent or degreaser and allow to dry. Check for rust, corrosion and damage. If any pitting or corrosion is present, replace the bearing.
Note: If replacing the bearing cone, you should also replace the race, and vice versa. Since they “seat” themselves, this will ensure longer performance.
Grease the race surfaces and pack the bearings with as much grease as they can hold. The method to repack bearings is as follows:
Place a quantity of grease into the palm of your hand.
Press a section of the bearing into the grease pile forcing grease into the interior of the bearing.
Repeat this while rotating the bearing from roller to roller.
Continue this process until you have the entire bearing completely filled with grease.
Before reinstalling, apply a generous coat of grease on the race and in the hub cavity.
Wipe the spindle with a rag and solvent. Check for bending, wear and corrosion. Grease the spindle.
For more information regarding trailer bearings, click here.
Lancaster, C., & Klein, R. (2009). The Trailer Handbook: A Guide to Understanding Towing & Trailer Safety. Topeka, KS: National Association of Trailer Manufacturers.
Reinstalling Your Hub
Replace the larger inner bearing in the back of the hub and smear grease around the top edge.
Install a new grease seal using a block of wood to obtain even pressure as you hammer the seal into place.
Turn the hub over and pack grease into the hub cavity. Replace the small outer bearing and smear grease around the top edge.
Replace the hub back onto the spindle.
Replace the flat washer and castle nut.
Bearing Adjustment. Tighten the slotted castle nut until the hub drags slightly when rotated. Rotating the hub while tightening the nut will “seat” the bearings and grease the seal. Once hand tightened with your channel locks, loosen the castle nut 1/6 turn (one hex) to align nut with the cotter pin hole. The hub should turn freely.
Replace the cotter pin through nut and spindle. If necessary, loosen, never tighten, the nut to align the slot with the hole in the spindle. Bend one leg on the cotter pin over the spindle and the other leg over the nut. The cotter pin must be tight. Tap the legs slightly to set firm.
Replace dust cap.
Once the wheel and tire are mounted, a final check will ensure the hub is seated. With the lug nuts tight and the tire off the ground, grab the tire with both hands and shake slightly. There should be very little movement. When adjusted properly, movement at the tire tread should be between 1/8” and ¼”. No movement means it may be too tight and cause the bearings to overheat and fail prematurely. If it is too loose, the grease seal and bearings are not sealed.
Lancaster, C., & Klein, R. (2009). The Trailer Handbook: A Guide to Understanding Towing & Trailer Safety. Topeka, KS: National Association of Trailer Manufacturers.
Trailer Brakes
Properly functioning brake shoes and drums are essential to ensure safety. You must have your dealer inspect these components at least once per year, or each 12,000 miles. Brake adjustment is not covered under the axle warranty.
The brake shoes must be adjusted after the first 200 miles of use, and each 3,000 miles thereafter. Most axles are fitted with a brake mechanism that will automatically adjust the brake shoes when the trailer is “hard braked” from a rearward direction.
Note: Trailer disc brakes are self-adjusting and do not need to be periodically adjusted.
Using pads or shoes without enough brake lining material can result in brake damage, create excessive heat and potentially cause the loss of braking capacity. Read your axle and brake manual to see how to adjust your brakes. If you do not have this manual, contact your dealer for assistance.
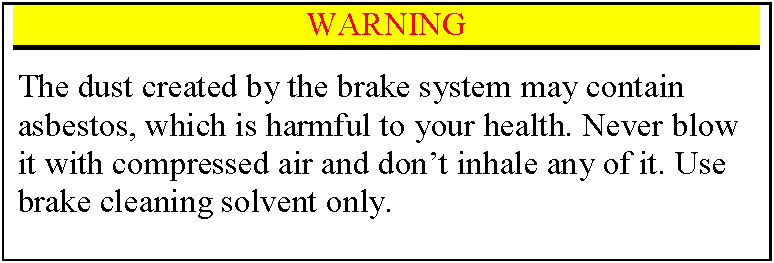
Brake Shoes – Properly functioning brake shoes are essential to trailer safety. To inspect brake shoe lining, remove hub. Once the hub is removed and before you start any service or inspection, clean the brake assembly with brake system cleaner and allow it to dry. Never use compressed air or a brush to remove dust.
Inspect both leading and trailing brake shoe lining for excessive wear. Hairline heat cracks are normal; however, if the lining is worn more than 1/16th inch, corroded, damaged or contaminated with grease or oil, replace the brake shoes.
Replace brake shoes per the manufacturer’s owner’s manual. Otherwise, reassemble the hub and manually adjust the brake shoe.
Note: If replacing brake shoes on one wheel, the opposite wheel should also be replaced. Whenever brake shoes are replaced, the retracting and hold-down springs should also be replaced.
Manual Brake Adjustment

Some braking systems are not automatically adjusted. These brakes require manual adjustment. Most brake assemblies are fitted with an adjustor, which can manually adjust the brakes during hard stops. This provides the correct pressure when activating your brakes. To check proper adjustment, manually engage your brakes and have someone check to see if the hub moves or spins. If you can spin the hub by hand while the brakes are engaged, you will need to manually adjust your brake shoes. If you repair or replace brake shoes or components, your brakes need to be adjusted.
The following steps apply to most manually adjustable brakes. You should refer to the manufacturer’s axle and brake manual for proper adjustment of your system. If you do not have this manual, contact your dealer for assistance.
A general manual brake adjustment process is listed below.
Jack up the trailer and secure it on adequate capacity jack stands.
Be sure the wheel and brake drum rotate freely.
Remove the adjusting-hole cover from the adjusting slot on the bottom of the brake backing plate.
With a screwdriver or standard adjusting tool, rotate the starwheel of the adjuster assembly to expand the brake shoes. Adjust the brake shoes out until the pressure of the linings against the drum makes the wheel very difficult to turn. Note: Your trailer maybe equipped with drop spindle axles. See axle manual for your axle type. You will need a modified adjusting tool for adjusting the brakes in these axles.
Rotate the starwheel in the opposite direction until the wheel turns freely with a slight constant drag.
Replace the adjusting-hole cover.
Repeat the above procedure on all brakes.
Lower the trailer to the ground.
For more information regarding the adjustment of electric trailer brakes, click here.
Electric Brakes
Electric brakes are actuated by an electromagnet, which grabs the armature surface of the hub when a small current is applied. The current is received by either the tow vehicle or a breakaway battery. When the trailer brakes are operated by the tow vehicle, it is important they are “synchronized” so braking is properly distributed to both the tow vehicle and the trailer. Synchronization is accomplished by adjusting the gain on the tow vehicle controller. With the tow vehicle hooked up to the trailer, make several hard stops on dry pavement. If the trailer’s brakes skid or are too sensitive, decrease the gain on the brake controller. If they do not skid, slightly increase the gain setting. Remember, this gain setting is load sensitive. Readjust the gain if the trailer’s load changes.
Inspect for any loose or worn parts including stretched or deformed springs in the brake assembly. Replace if needed.
Inspect the electromagnets for uneven or abnormal wear. Use a small straight edge to check for even wear. If worn, or the magnet coil has become visible, replace the magnet.
Note: It is recommended the hub armature surface be turned when magnets are replaced. Magnets should be replaced in pairs. If you change a magnet on one hub, the opposite magnet should also be replaced.
Breakaway Brake Battery
This battery supplies a current to operate the trailer brakes, if the trailer breaks away from the tow vehicle. Check the battery for proper power level.
Breakaway Switch
This switch activates the breakaway battery to supply a current to the electric breaks if the trailer breaks away from the tow vehicle. A cable for the pull pin is connected to the tow vehicle and the switch is located on the trailer.
In order to test the breakaway system, the trailer should be hitched to the tow vehicle.
Unplug the trailer connector from the tow vehicle
Pull the pin out of the breakaway switch. This will take 40 pounds of pull.
Try to tow the trailer.
All of the wheels should be locked up and will brake so the trailer is unable to roll freely.
Re-insert pin to the breakaway switch and reconnect the trailer plug to the tow vehicle.
Charge the breakaway brake battery as necessary.
Testing Breakaway Systems. (2011, August 11). Retrieved March 20, 2018, from https://www.etrailer.com/faq-tb-11-06-test-trailer-breakaway-system.aspx
Hydraulic/Surge Brakes
Hydraulic or surge brakes are among the most common braking system used on trailers in the rental industry. Unlike electric brakes, they do not require any special device or controller in the tow vehicle.
Surge brakes are activated by the stopping inertia created between the tow vehicle and the trailer. When the tow vehicle reduces speed, pressure is applied to an actuating coupler on the trailer. The pressure forces hydraulic fluid from a master cylinder in the actuator coupler, through hydraulic lines, to a wheel cylinder which, in turn, applies force against the brake shoes and hub.
Because surge breaks are a self-contained systems, upkeep is vital to safe and reliable operation. The key to a successful and lasting operation of the surge brake unit is to keep the master cylinder free of contamination, and always maintain proper levels of brake fluid.
Inspect the wheel cylinder for leaks and proper operation. Clean with brake cleaner only. Use fresh brake fluid to flush the cylinder. Repair or replace if needed.
Inspect the brake lines for kinks, cracks or breaks. Clean lines to check for fresh leaks. Repair or replace as necessary. Use fresh brake fluid to flush lines. Bleed system, if needed, to remove all air.
Block tires if working with trailer on the ground. Otherwise, jack up the trailer and secure it on adequate capacity jack stands. Follow trailer manufacturer's recommendations for lifting and supporting the trailer Ensure the hydraulic surge brake coupler is fully extended, relieving any pressure on the brake shoes.
Fill master cylinder with fluid. Install a bleeder hose (clear if available) on first wheel cylinder to be bled (if tandem axle trailer, bleed rear axle first). Submerge loose end of hose in a clear container of brake fluid to observe bubbling.
Loosen the bleeder screw, located in the wheel cylinder one half turn. The system will be open to the atmosphere through the passage drilled in the screw. Pump actuator one full stroke and hold (using breakaway level or coupler). Now, close the bleeder valve and release the lever. After the lever is back, open the bleeder valve, pull the lever forward and hold. This process must be repeated until bubbles stop coming out of the hose in the clear container. Be sure to close bleeder screw securely.
Repeat bleeding operation at each wheel cylinder. During the bleeding process, replenish the brake fluid so the level does not fall below the half full level in the master cylinder reservoir. After bleeding is complete, fill the master cylinder reservoir and secure the filler cap.
After the bleeding operation is complete, apply pressure to the system and check the brake system for leaks.
Inspect for any loose or worn parts, including stretched or deformed springs in the brake assembly. Replace if needed.
Inspect inner slide for bowing or indention at rollers. Excessive weight or heavy use may bend the inner slide mechanism at the roller location, when in normal operation. This may not allow the inner slide to move freely and apply proper force to the master cylinder for adequate braking.
Inspect the master cylinder for proper fluid level. Use only DOT-3 or DOT-4 brake fluid from a sealed container. Improper fluid level is one of the most common causes of hydraulic brake failure, while the most easy to prevent. If the fluid gets too low or goes empty, you will have to bleed the complete brake fluid system. This is no easy task and may never have to be done under normal operating conditions. Refer to the manufacturer’s owner’s manual for fluid requirements.
If you find or see brake fluid leaks, they should be attended to immediately. Check the surge brake master cylinder for proper brake fluid levels to avoid having to bleed the entire system.

Axles
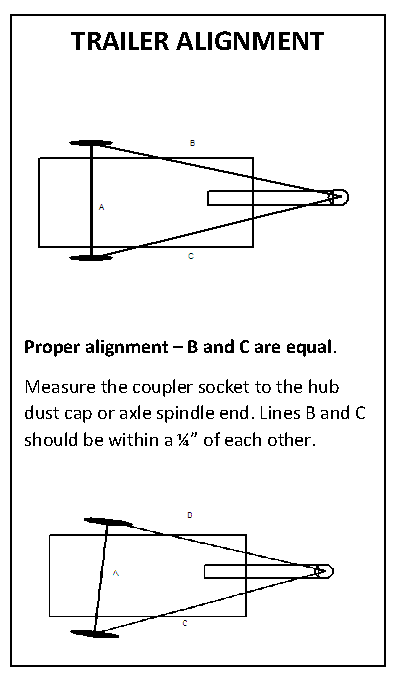
Check to see if the trailer alignment is correct
Inspect axle welds and joints
Inspect for damage on the spindle where it is welded to the axle tube
Bent axles or spindles cause excess tire wear, and potentially increases sway and whipping during towing.
Trailer Structure
Fasteners and Frame Members
Inspect all fasteners, bolts, nuts, screws, rivets and structural frame members for bending and other damage, cracks, or failure at least once a year.
Repair or replace any damaged fastener and repair the frame member.
If you have any questions about the condition or method of repair of fasteners or frame members, get the recommendation of, or have the repair done by your dealer.
NOTE: Broken or damaged fasteners can cause injury or damage to trailer and contents.
Welds
All welds can crack or fail when subjected to heavy loads or movement of cargo that was not properly secured. Any time that you know or suspect that the trailer has been subjected to heavy loads or movement of cargo, immediately inspect the welds and fasteners for damage. To prevent severe damage to your trailer, inspect all of the welds for cracks or failure at least once a year.
If you find a crack it should NOT be welded over. The crack needs to be properly repaired to ensure the structural integrity of the trailer. If a weld failure is detected, contact your dealer.
Most frame and structure failure are a result of too much load for the material of the trailer. The two areas which should be closely checked for fatigue or stress is (1) all points where the tongue attaches to the trailer; and (2) where the spring hangers are welded to the trailer frame.
A good indicator of cracks, stress or fatigue can be rust. If you see rust occurring it warrants closer inspection.
doors, ramps & gates
Inspect hinges, handles and securing mechanisms.
Grease or lubricate as needed.
Check door seals and replace if needed.
Check ramp gates for broken welds or bents and loose edges.
Cargo trailer door ramps may have cables and springs to assist in opening and closing. Check cables for fraying and worn spring components.
Trailer Components
Couplers

Ball Couplers: The coupler is the point on the trailer which is connected to the tow vehicle. There are several types of coupling devices, but the ball coupler is used in lighter-duty trailers, and most common in the rental fleet, where the others tow much heavier weights.
Inspect the coupler ball socket to ensure it is not bent or dented. The ball seats in the socket with very little tolerance, any indentions could cause the ball not to seat properly. After the trailer is attached to the tow vehicle, tighten the hand wheel or latch on the coupler and physically check to ensure it is tight against the ball. If possible, shake the trailer tongue to ensure a tight fit.
The coupler latch lever must be able to rotate freely and automatically snap into the latched position. Oil the pivot points, sliding surfaces, and spring ends with SAE 30W motor oil. Keep the ball pocket and latch mechanism clean. Dirt or contamination can prevent proper operation of the latching mechanism.
Inspect threads on coupler hand wheel and latch bolts. If rusty or damaged they may appear to feel tight when they are not. Replace or repair if necessary.
Inspect hitch ball for proper capacity and wear or damage. Repair or replace if necessary.
Replace all broken or bent coupler parts before towing. When replacing a ball, the load rating MUST match or exceed the GVWR of the trailer.
Pintle:
Before each tow, coat the ring with a thin layer of automotive bearing grease to reduce wear and ensure proper operation; and check the locking device that secures the pintle to the ring for proper operation.
See the pintle manufacturer’s manual for other inspection and maintenance activities. If you do not have this manual, contact your dealer for assistance.
If you see or feel evidence of wear, such as flat spots, deformations, pitting or corrosion, on the ring or pintle, immediately have your dealer inspect them to determine the proper action to prevent possible failure of the ring and pintle system. All bent or broken coupler parts must be replaced before towing the trailer.
The pintle handle lever must be able to rotate freely and automatically snap into the latched position. Oil the pivot points, sliding surfaces, and spring ends with SAE 30W motor oil. Keep the ring pocket and latch mechanism clean. Dirt or contamination can prevent proper operation of the latching mechanism.
When replacing a ring, the load rating must match or exceed the GVWR of the trailer.
safety chains
The purpose for safety chains is to keep the towed vehicle attached to the towing vehicle in case of failure of the coupler or ball. Safety chains are your first line of defense if the trailer detaches, and the chains should never drag on the road.
Inspect safety chains for wear or damage. Pay close attention to links that appear to have been dragging on the road. They may no longer be of sufficient strength due to damage and the length of chain should be adjusted to prevent any further dragging.
Replace if necessary.
Jacks are primarily used to lift and stabilize the trailer tongue, or front corners; for lifting the trailer to connect and disconnect from the tow vehicle. They are also used to keep the trailer level while not attached to the tow vehicle as well as stabilizing the rear of the trailer when loading and unloading. They may contain gears if the handle is on the side or an acme screw system if the handle in on the top.
Top wind - Check for proper function, top wind jacks normally require little internal maintenance. If they do not wind to raise and lower the leg, usually the complete jack needs replacing. Ensure the jack is stable and tightly fastened to the trailer. For swivel jacks, check mounting/swivel hardware for worn or broken parts.
Side wind – Check gears at top where handle cranks jack leg. Grease if needed, use grease fittings if present otherwise pump or hand pack grease into gears. Check at least annually. Ensure the jack is stable and tightly fastened to the trailer. For swivel jacks, check mounting/swivel hardware for worn or broken parts.
Lights, signals & Electrical
Always inspect lights before each use. Repair or replace as needed.
Inspect connectors for rust, corrosion, or other defects.
Inspect wire for pinches, kinks, or exposed bare wire. If repairs, or welding, have been done on the trailer, look for burned or scorched wires. Ensure bare wires do not contact metal from the trailer. This may cause the electrical system to short, blow fuses or possibly cause electrical fire.
Make sure connector-plug prongs and receptacles, light bulb sockets, wire splices and ground connections are clean and shielded from moisture.
Lightly coat all electrical terminal connections with nonconducting (dielectric), light waterproof grease.
Clean the prongs with very fine sandpaper, being careful not to damage the contact area.
Clean the surface deposits in the connector holes. (Make sure the lights are off to prevent blowing a fuse.) Try to clean off only the deposits and lubricate lightly with dielectric, light waterproof grease.
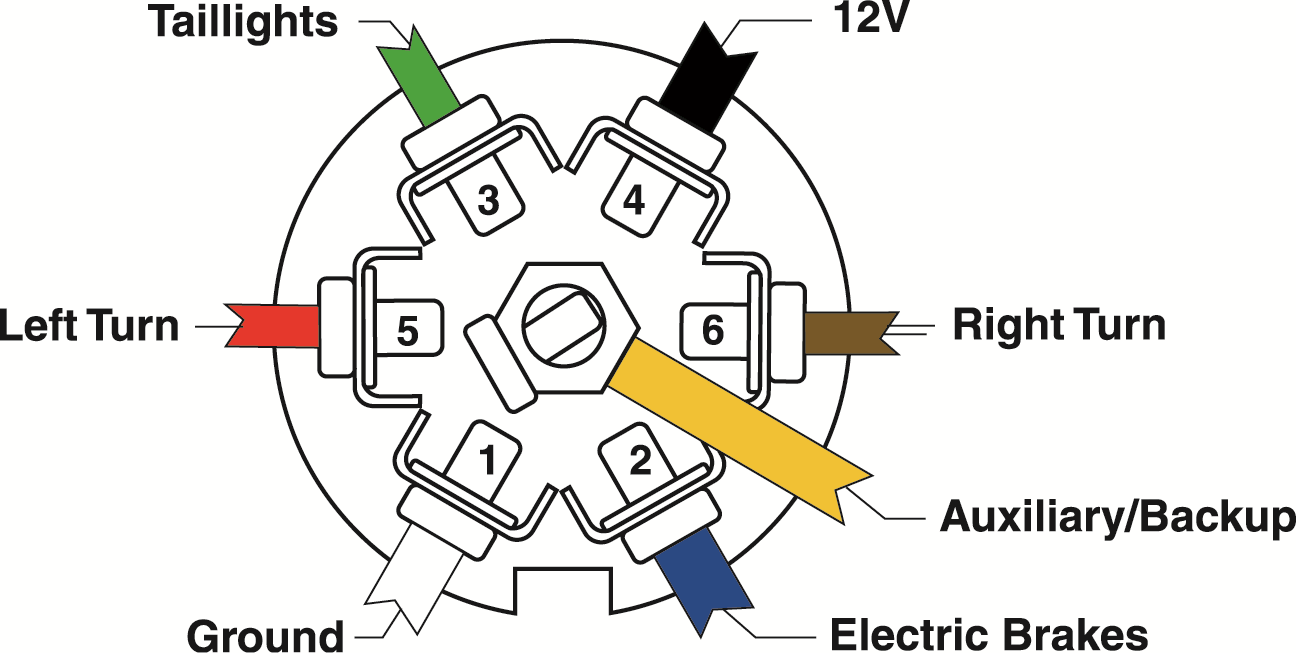
Before towing a trailer with electrical brakes ensure the connector on the trailer and tow vehicle are wired the same. See diagram for proper wiring of seven pole connectors.